The visual reference guide for documenting your Swift code
Updated for Xcode 15

I am a Software Engineer working on open source and enterprise mobile SDKs for iOS and MacOS developers written in Swift. From 🇩🇪 and happily living in 🇺🇸
In this blog post, I provide a complete overview of markdown and callout options to document your Swift code.
I also share tips and tricks to create documentation efficiently, as well as highlight differences in how documentation is rendered by Xcode Quick Help vs DocC Renderer vs. Jazzy.
Use Xcode's "Add documentation" option
How to get started?
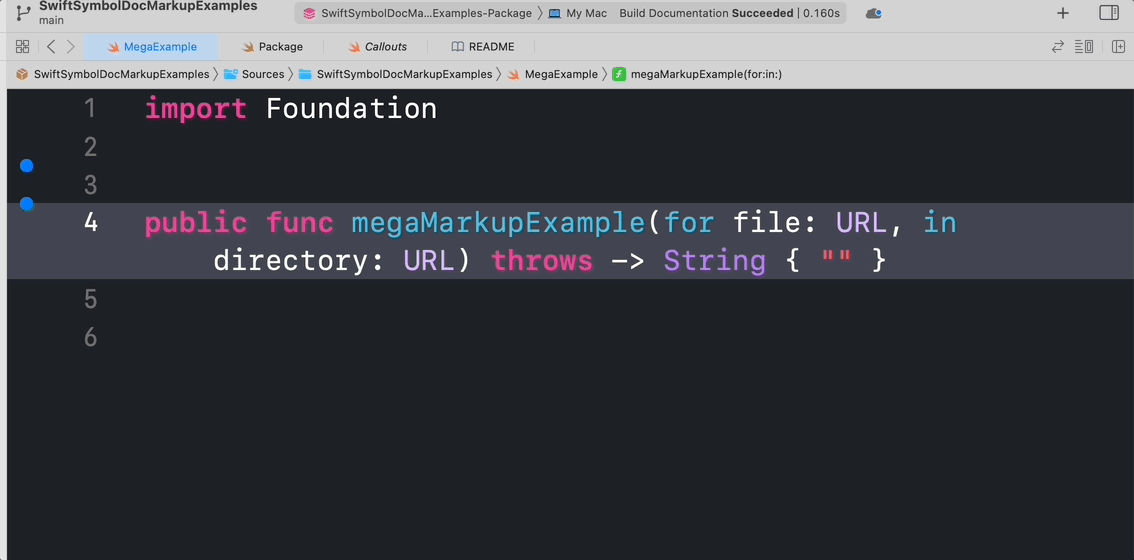
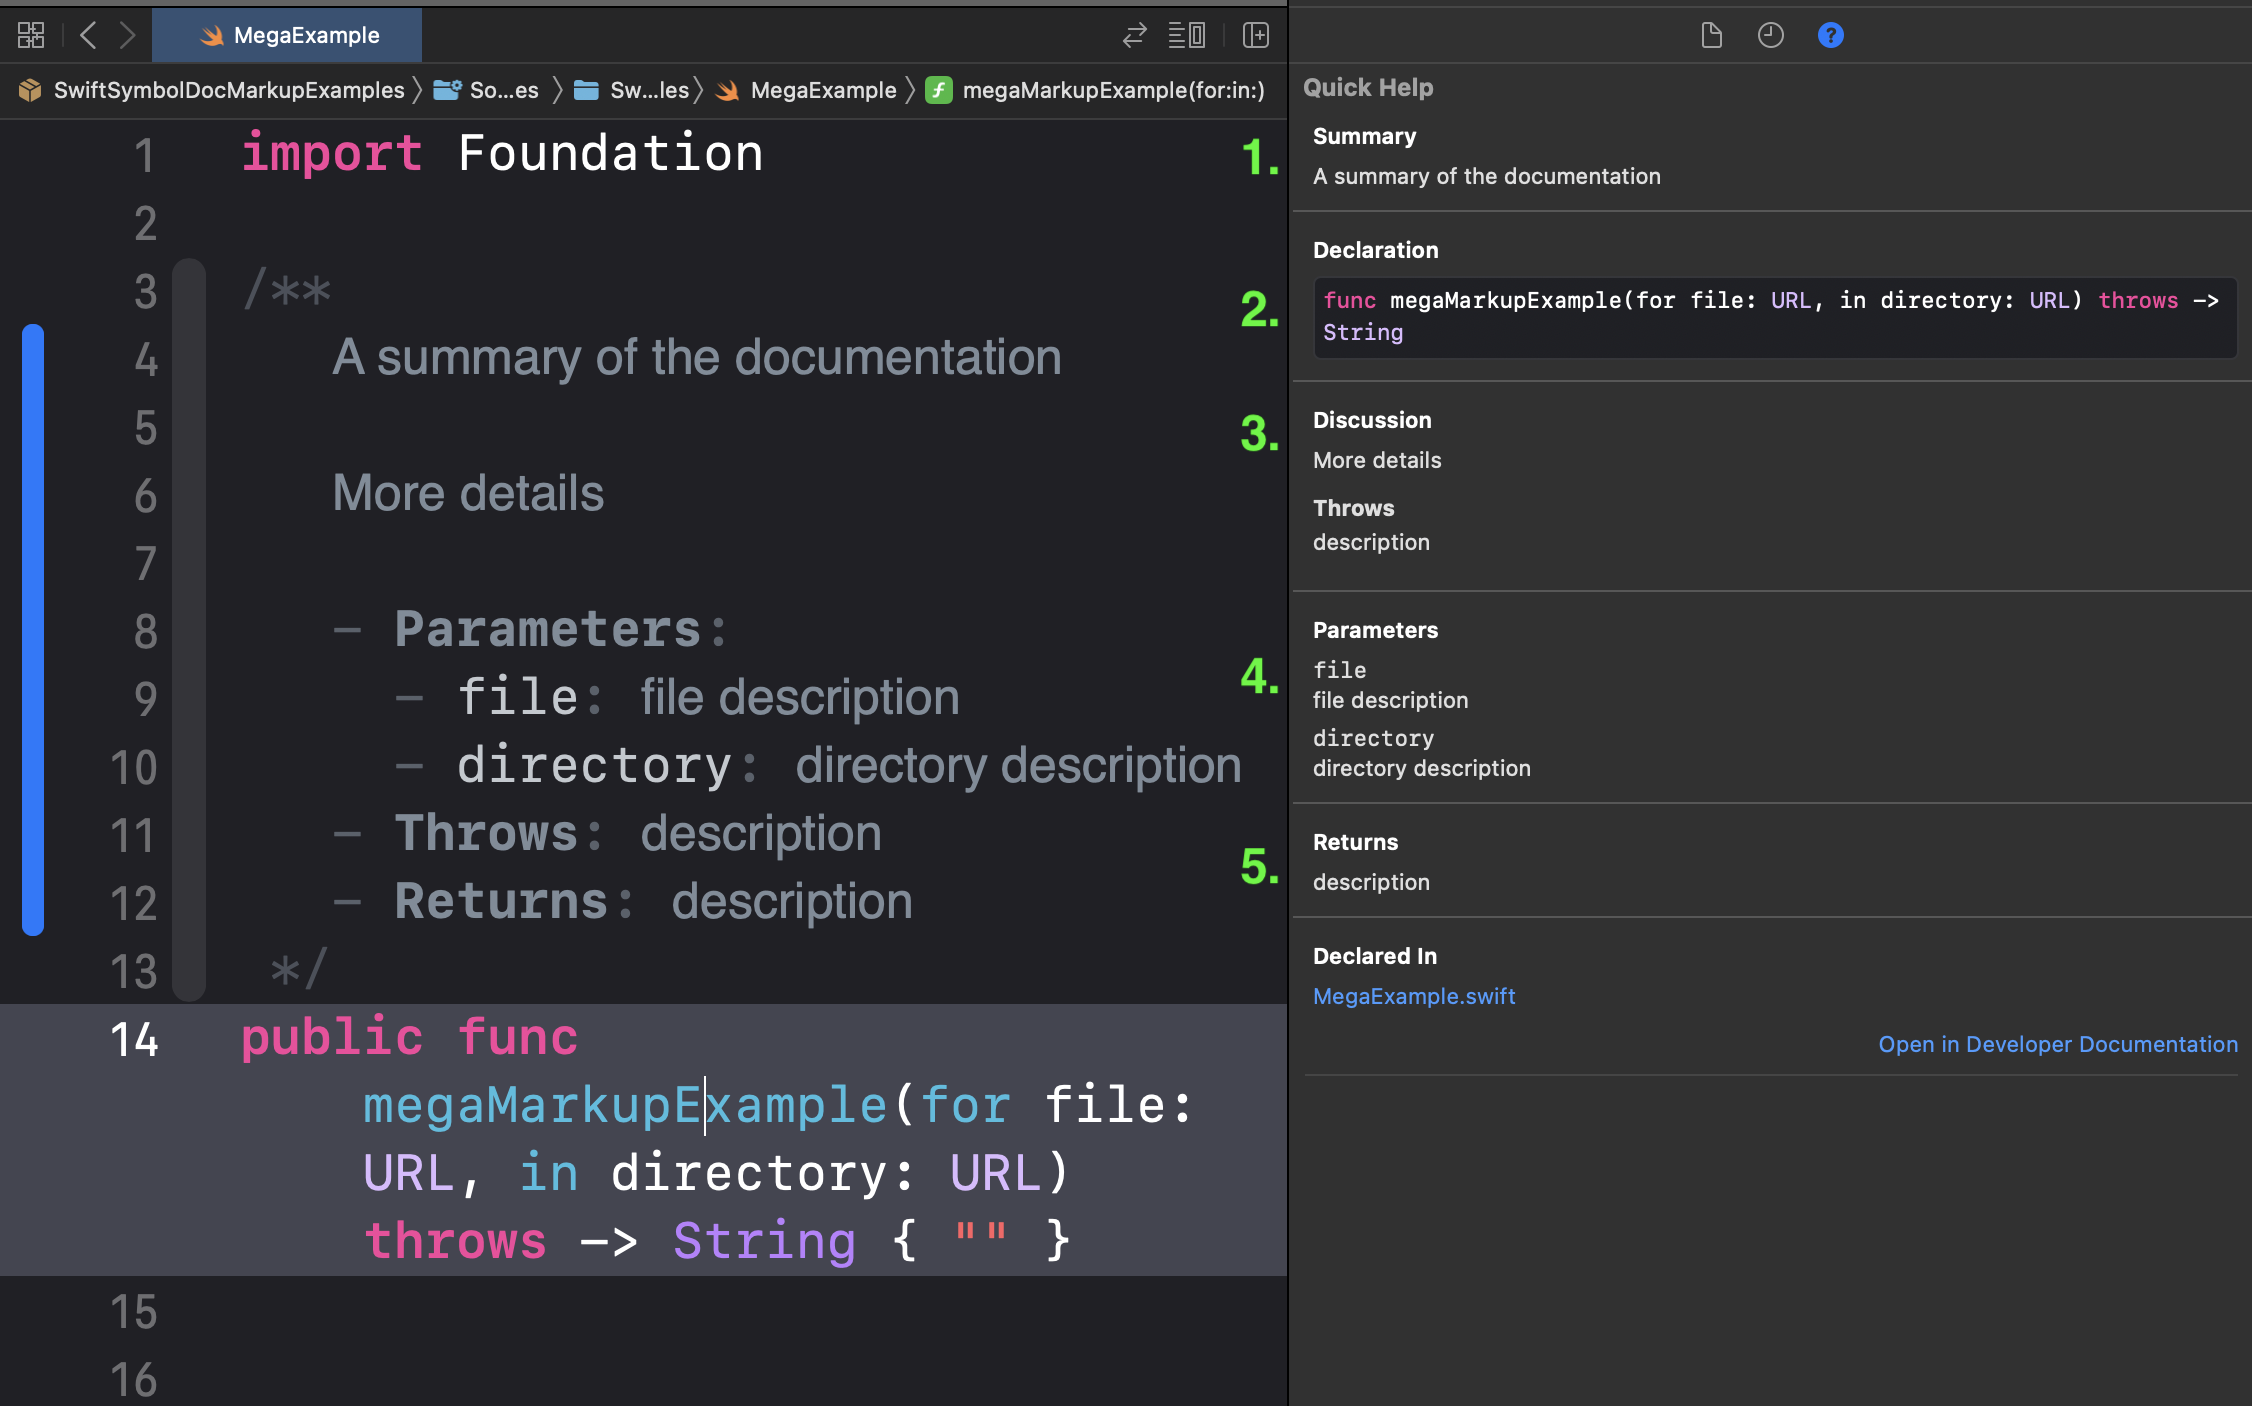
public func megaMarkupExample(for file: URL, in directory: URL) throws -> String { "missing Documentation :(" }
Xcode provides a convenient way to "Add Documentation" (⌥⌘/)
Xcode will add single-line comments (///), but I prefer the block comment notation.
/**
   A summary of the documentation
   - Parameters:
     - file: file description
     - directory: directory description
   - Throws: description
   - Returns: description
 */
Format with Markdown
You can use traditional markdown notation to format your code.
| Type | Visualization by DocC Renderer | Visualization by Xcode Quick Help |
| bold text | Yes | Yes |
| italic text | Yes | Yes |
Code Voice text | Yes | Yes |
| Code Block | Yes | Yes |
| Code Reference | Yes | Yes |
| Bulleted Lists | Yes | Yes |
| Numbered Lists | Yes | Yes |
| Links | Yes | Yes |
| Images | Yes | Xcode 15+ |
| Tables | Yes | Yes |
You must store local images in your documentation catalog (.docc) to be rendered.
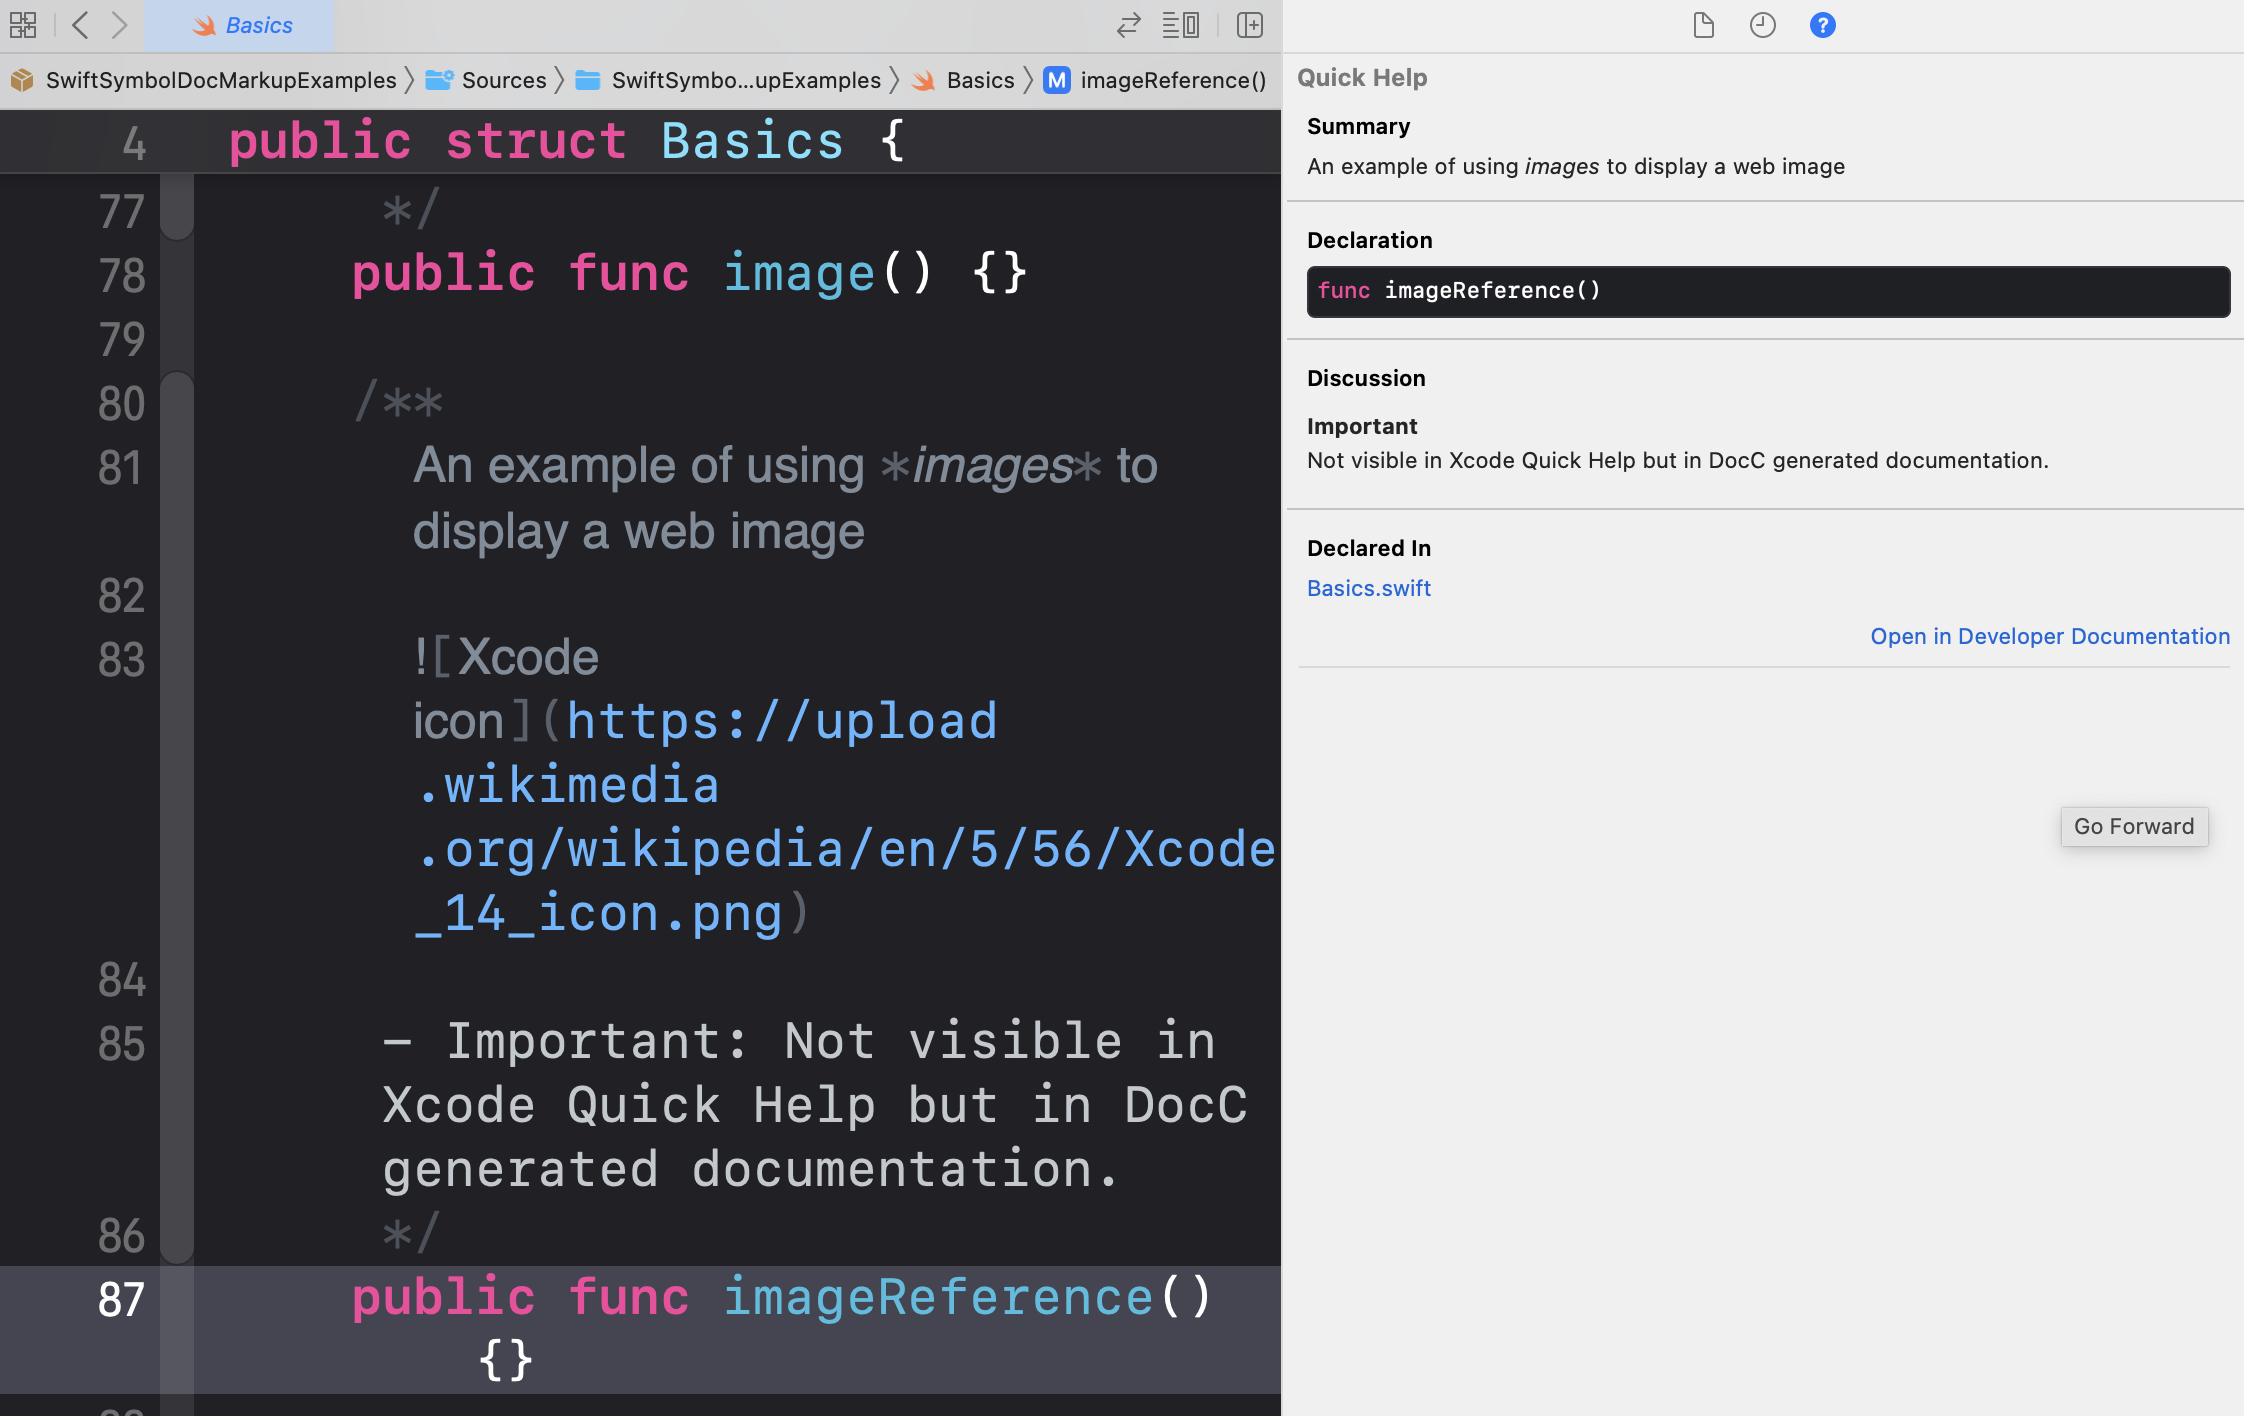
/**
An example of using *images* to display a local image.
You must store images you include in your documentation in a documentation catalog.

- Important: Not visible in Xcode Quick Help but in DocC generated documentation.
*/
public func image() {}
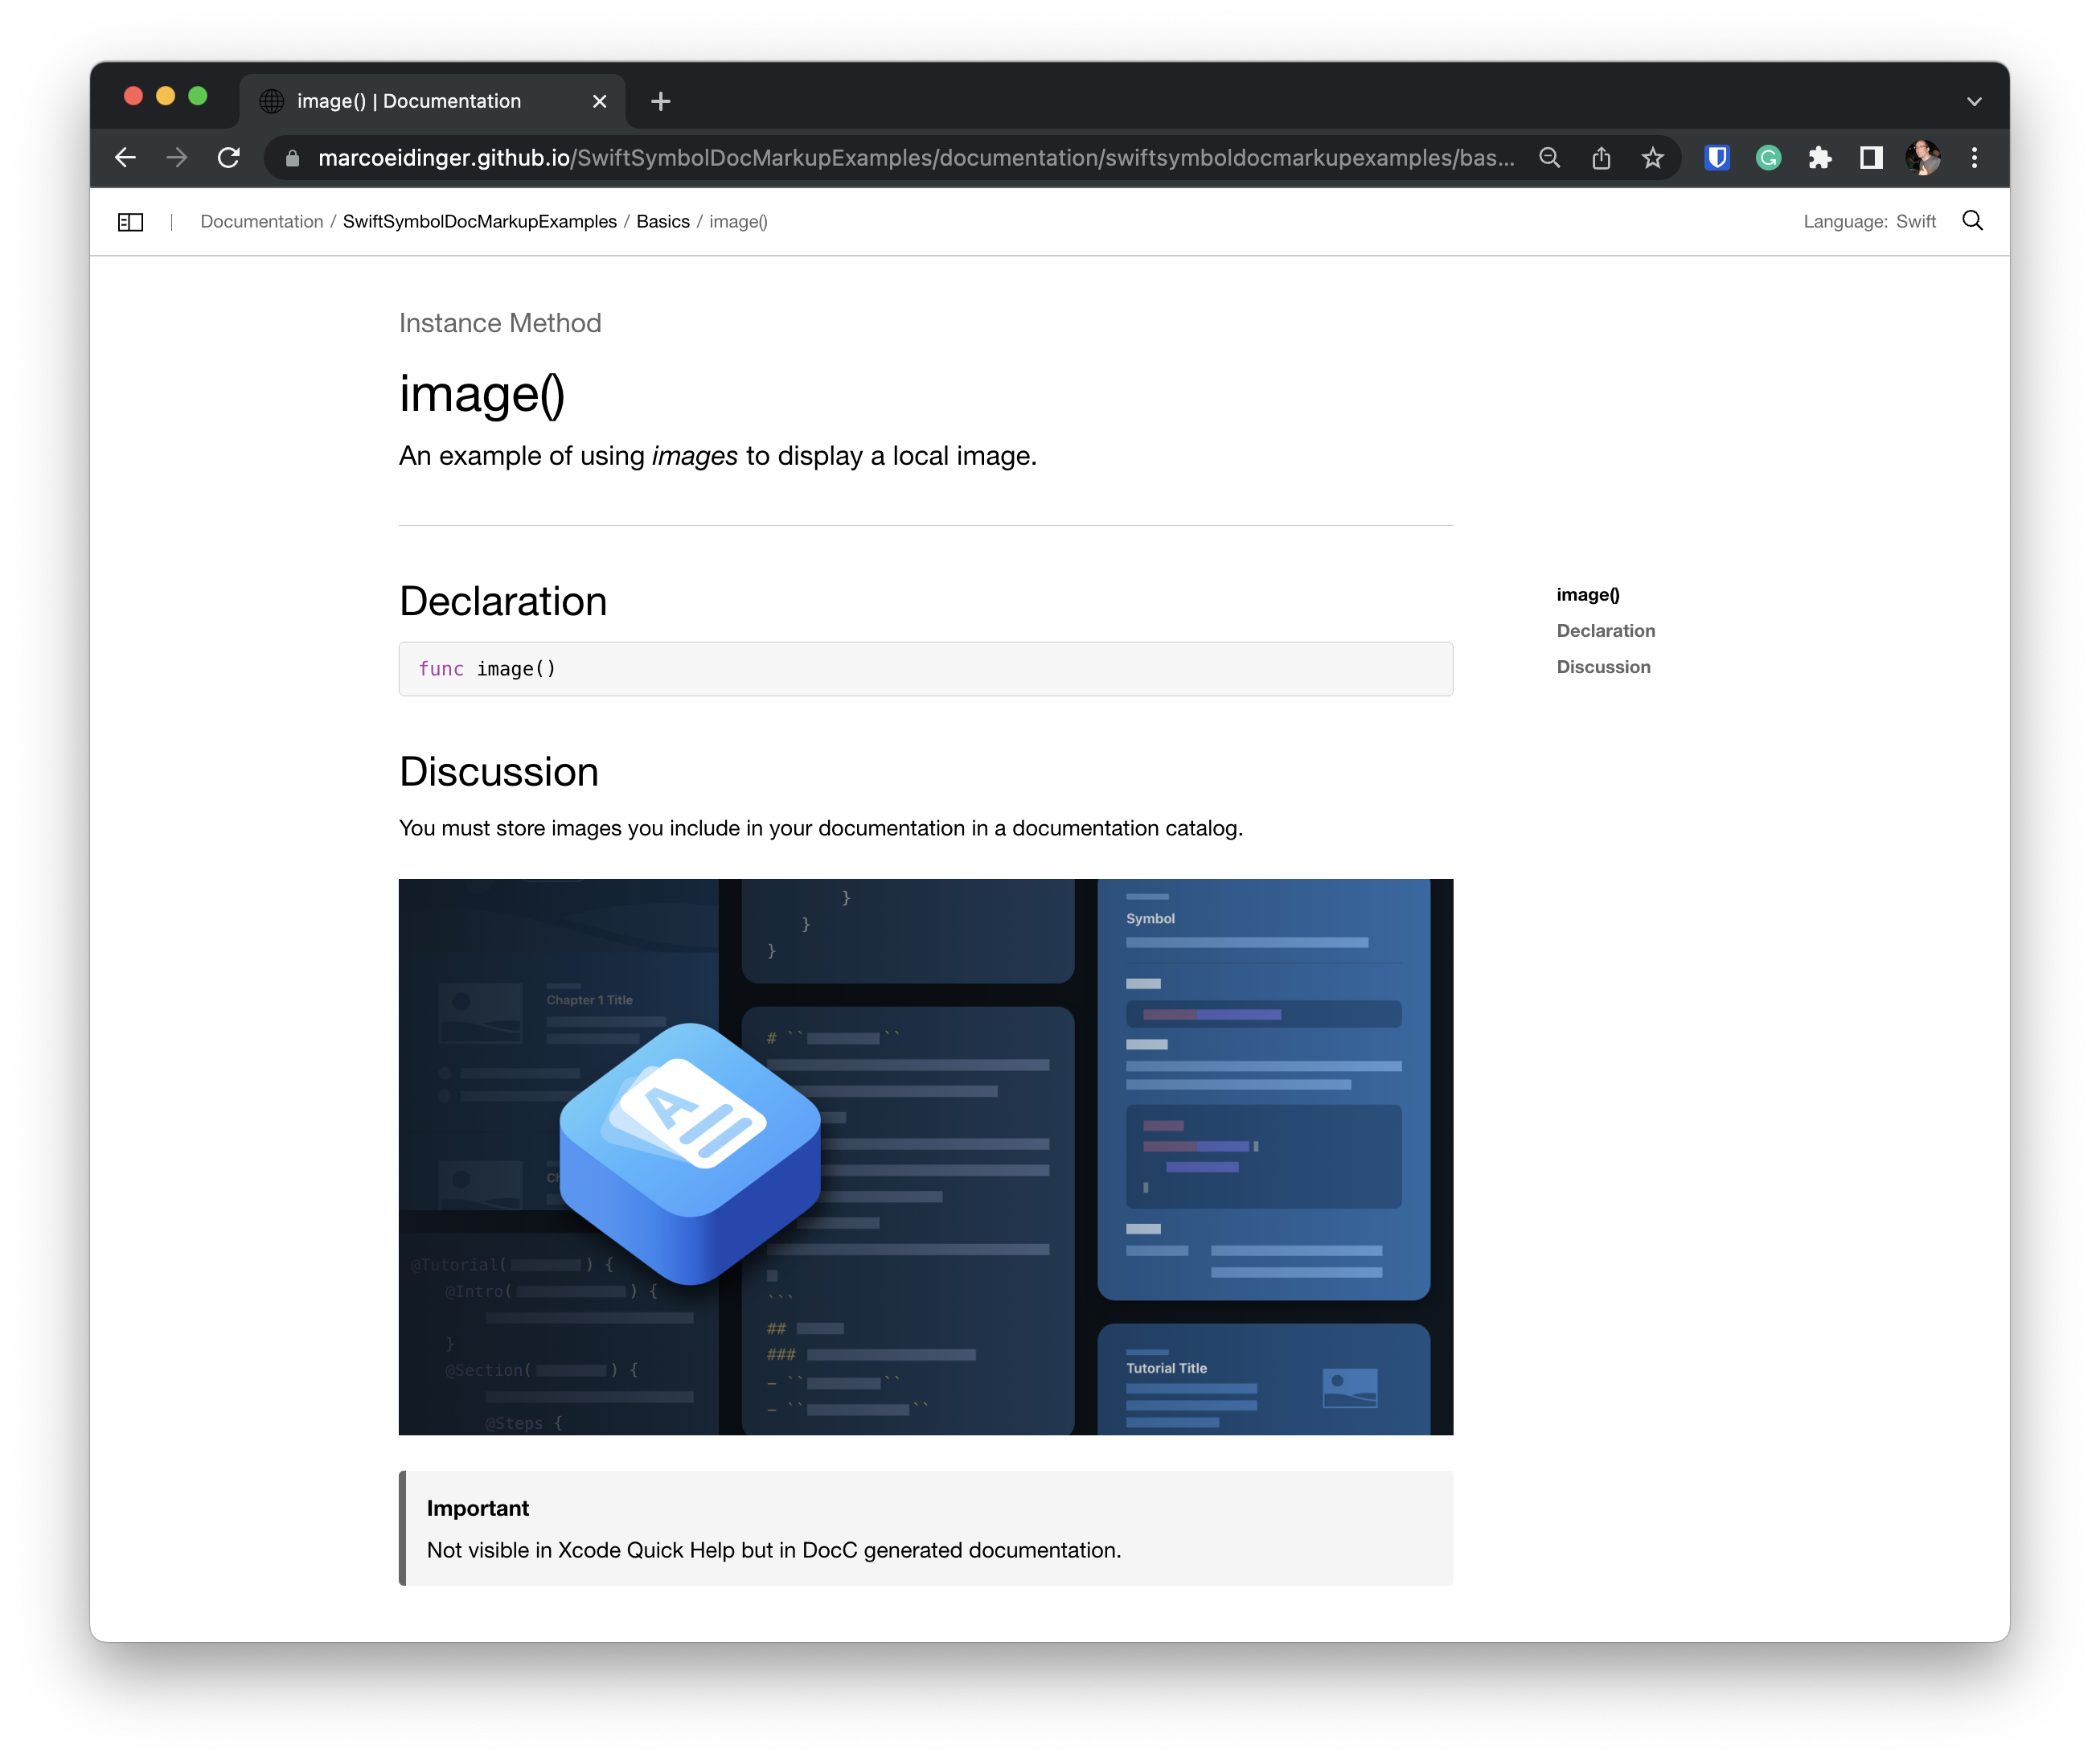
Local images and web images will be rendered in Quick Help staring with Xcode 15. Older Xcode versions do not render images as seen below.

Apple has a well-written Formatting your documentation content article explaining the basics.
But I also recommend you have a look at the individual examples I provide:
Anatomy of symbol documentation
I will talk about the documentation structure for a function/property. If you are more interested in configuring a landing page (for a framework or type), then please read the following:
The symbol documentation is grouped into sections.
| Order | Name | Comment |
| 1. | Summary | |
| 2. | Declaration | generated automatically |
| 3. | Discussion | can include markdown-formatted text & Callouts |
| 4. | Parameters | optional; lists the parameters for a method or function; will automatically be added when using "Add Documentation"(⌥⌘/) option in Xcode |
| 5. | Returns | optional; will automatically be added when using "Add Documentation" (⌥⌘/) option in Xcode |
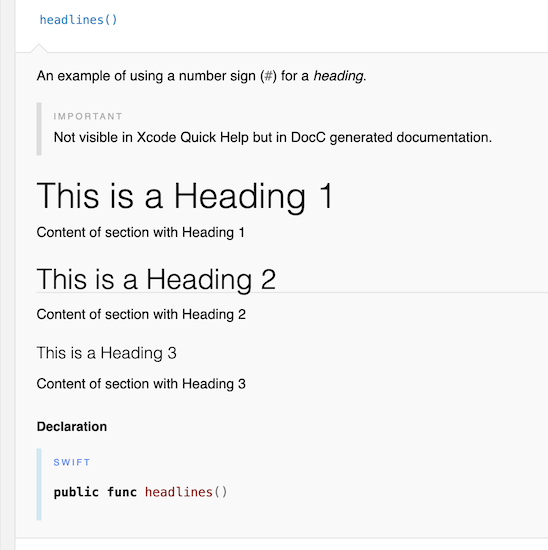
| 6. | <Custom Sections> | optional; multiple possible; can be added with headlines (X) |
Custom Sections can be defined with a heading (e.g. # This is a Heading 1)
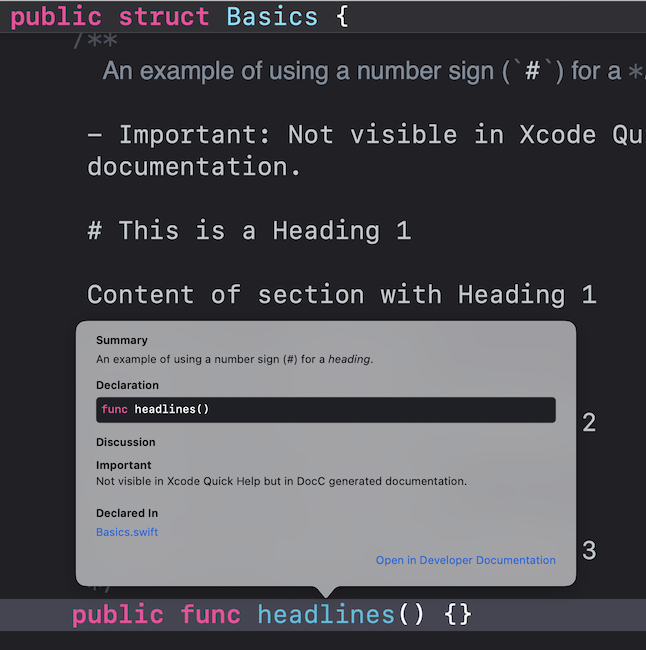
Xcode 15 will render custom sections in the Quick Help but older Xcode versions won't show custom sections compared to DocC ...
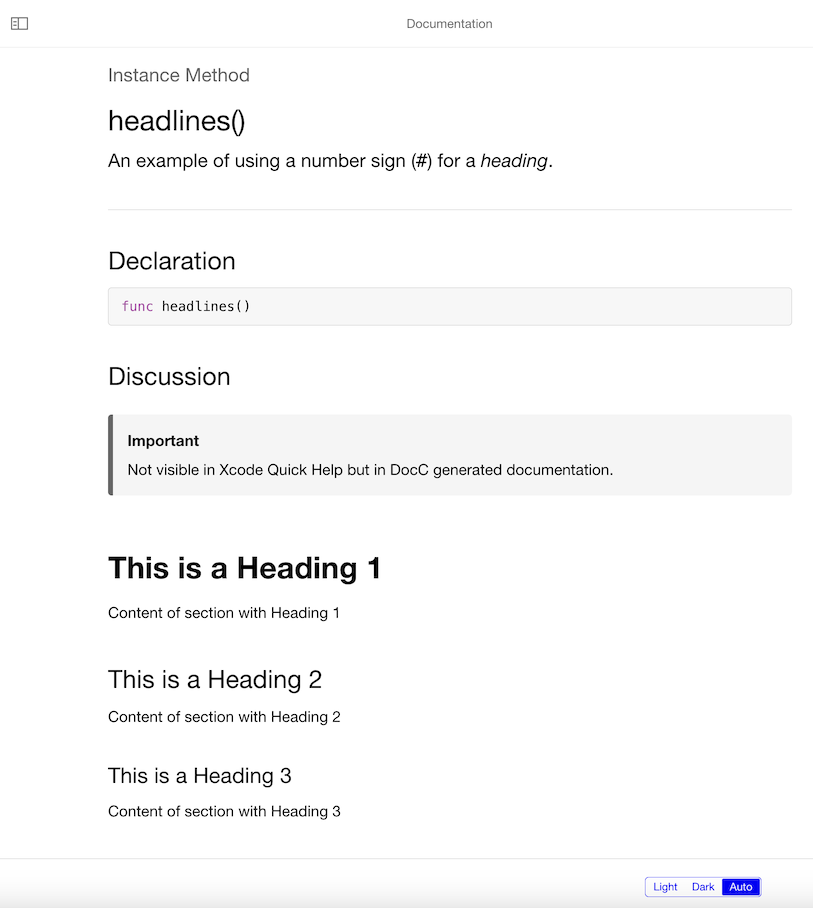
or Jazzy.
Important to know is some delimiters create a new section, but most delimiters create a callout box in the Discussion section.
Delimiters creating a section:
- Parameters:or- Returns:Delimiters creating a callout:
- Throws:and many more
Callouts
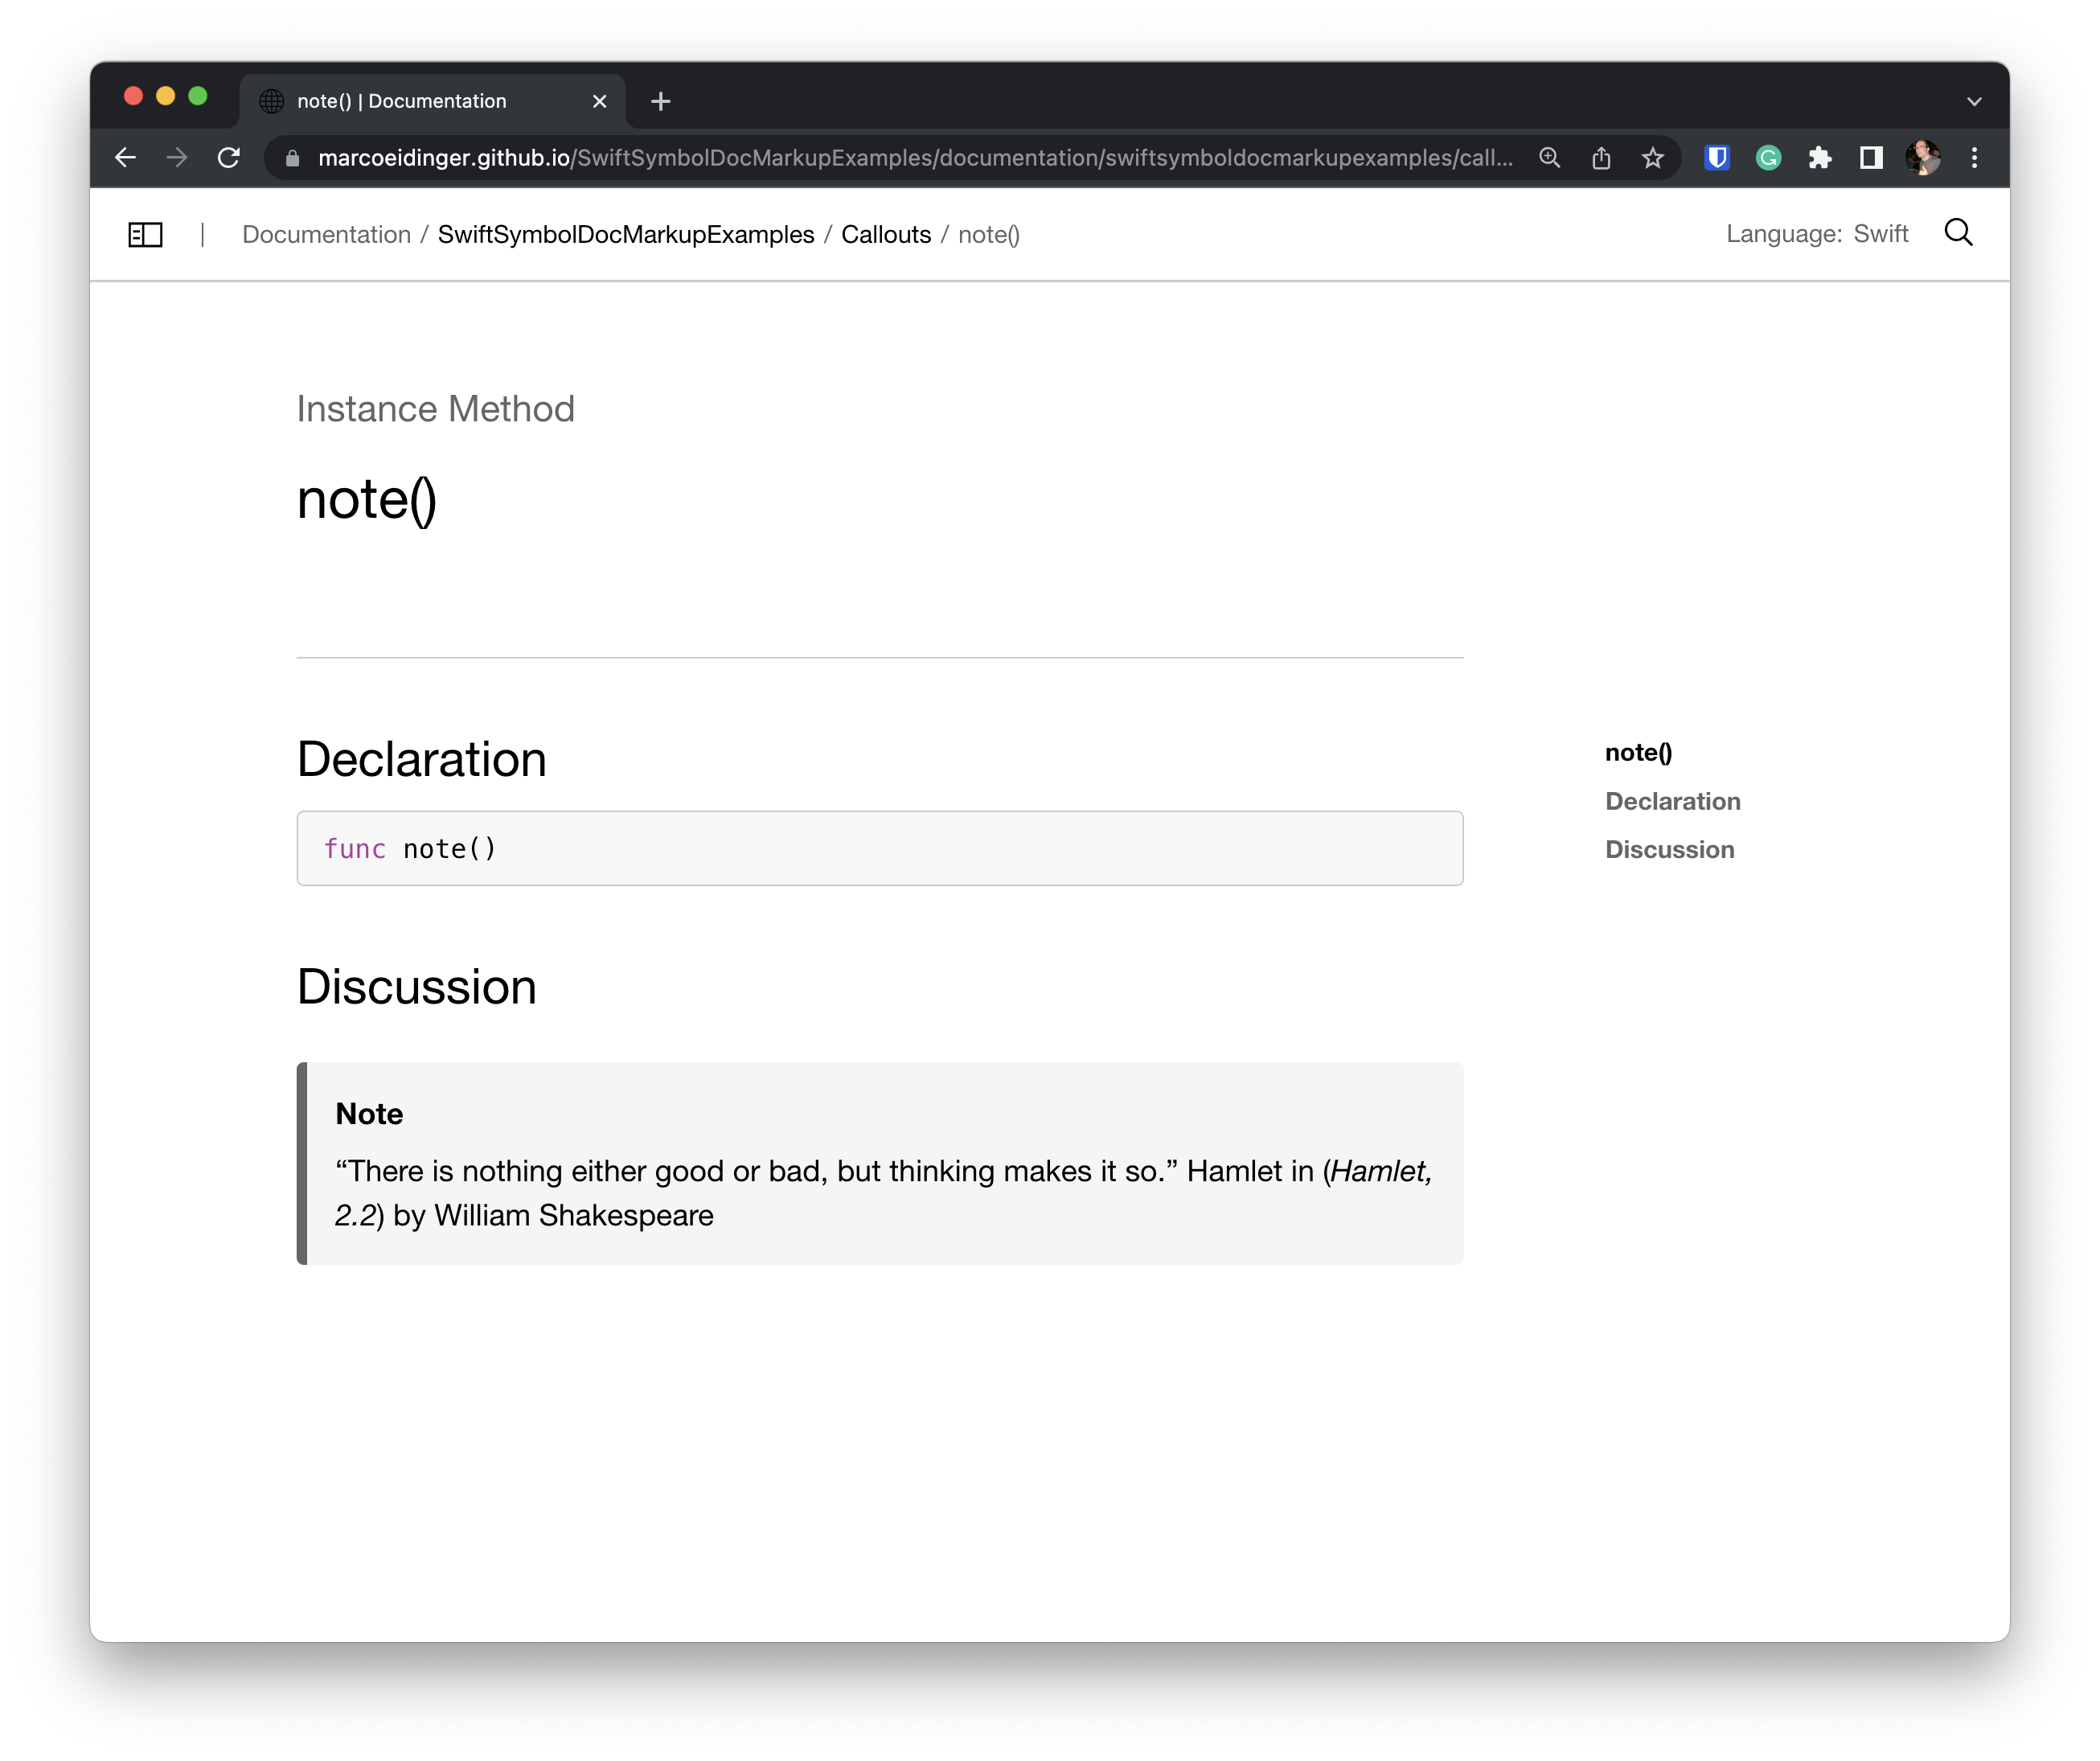
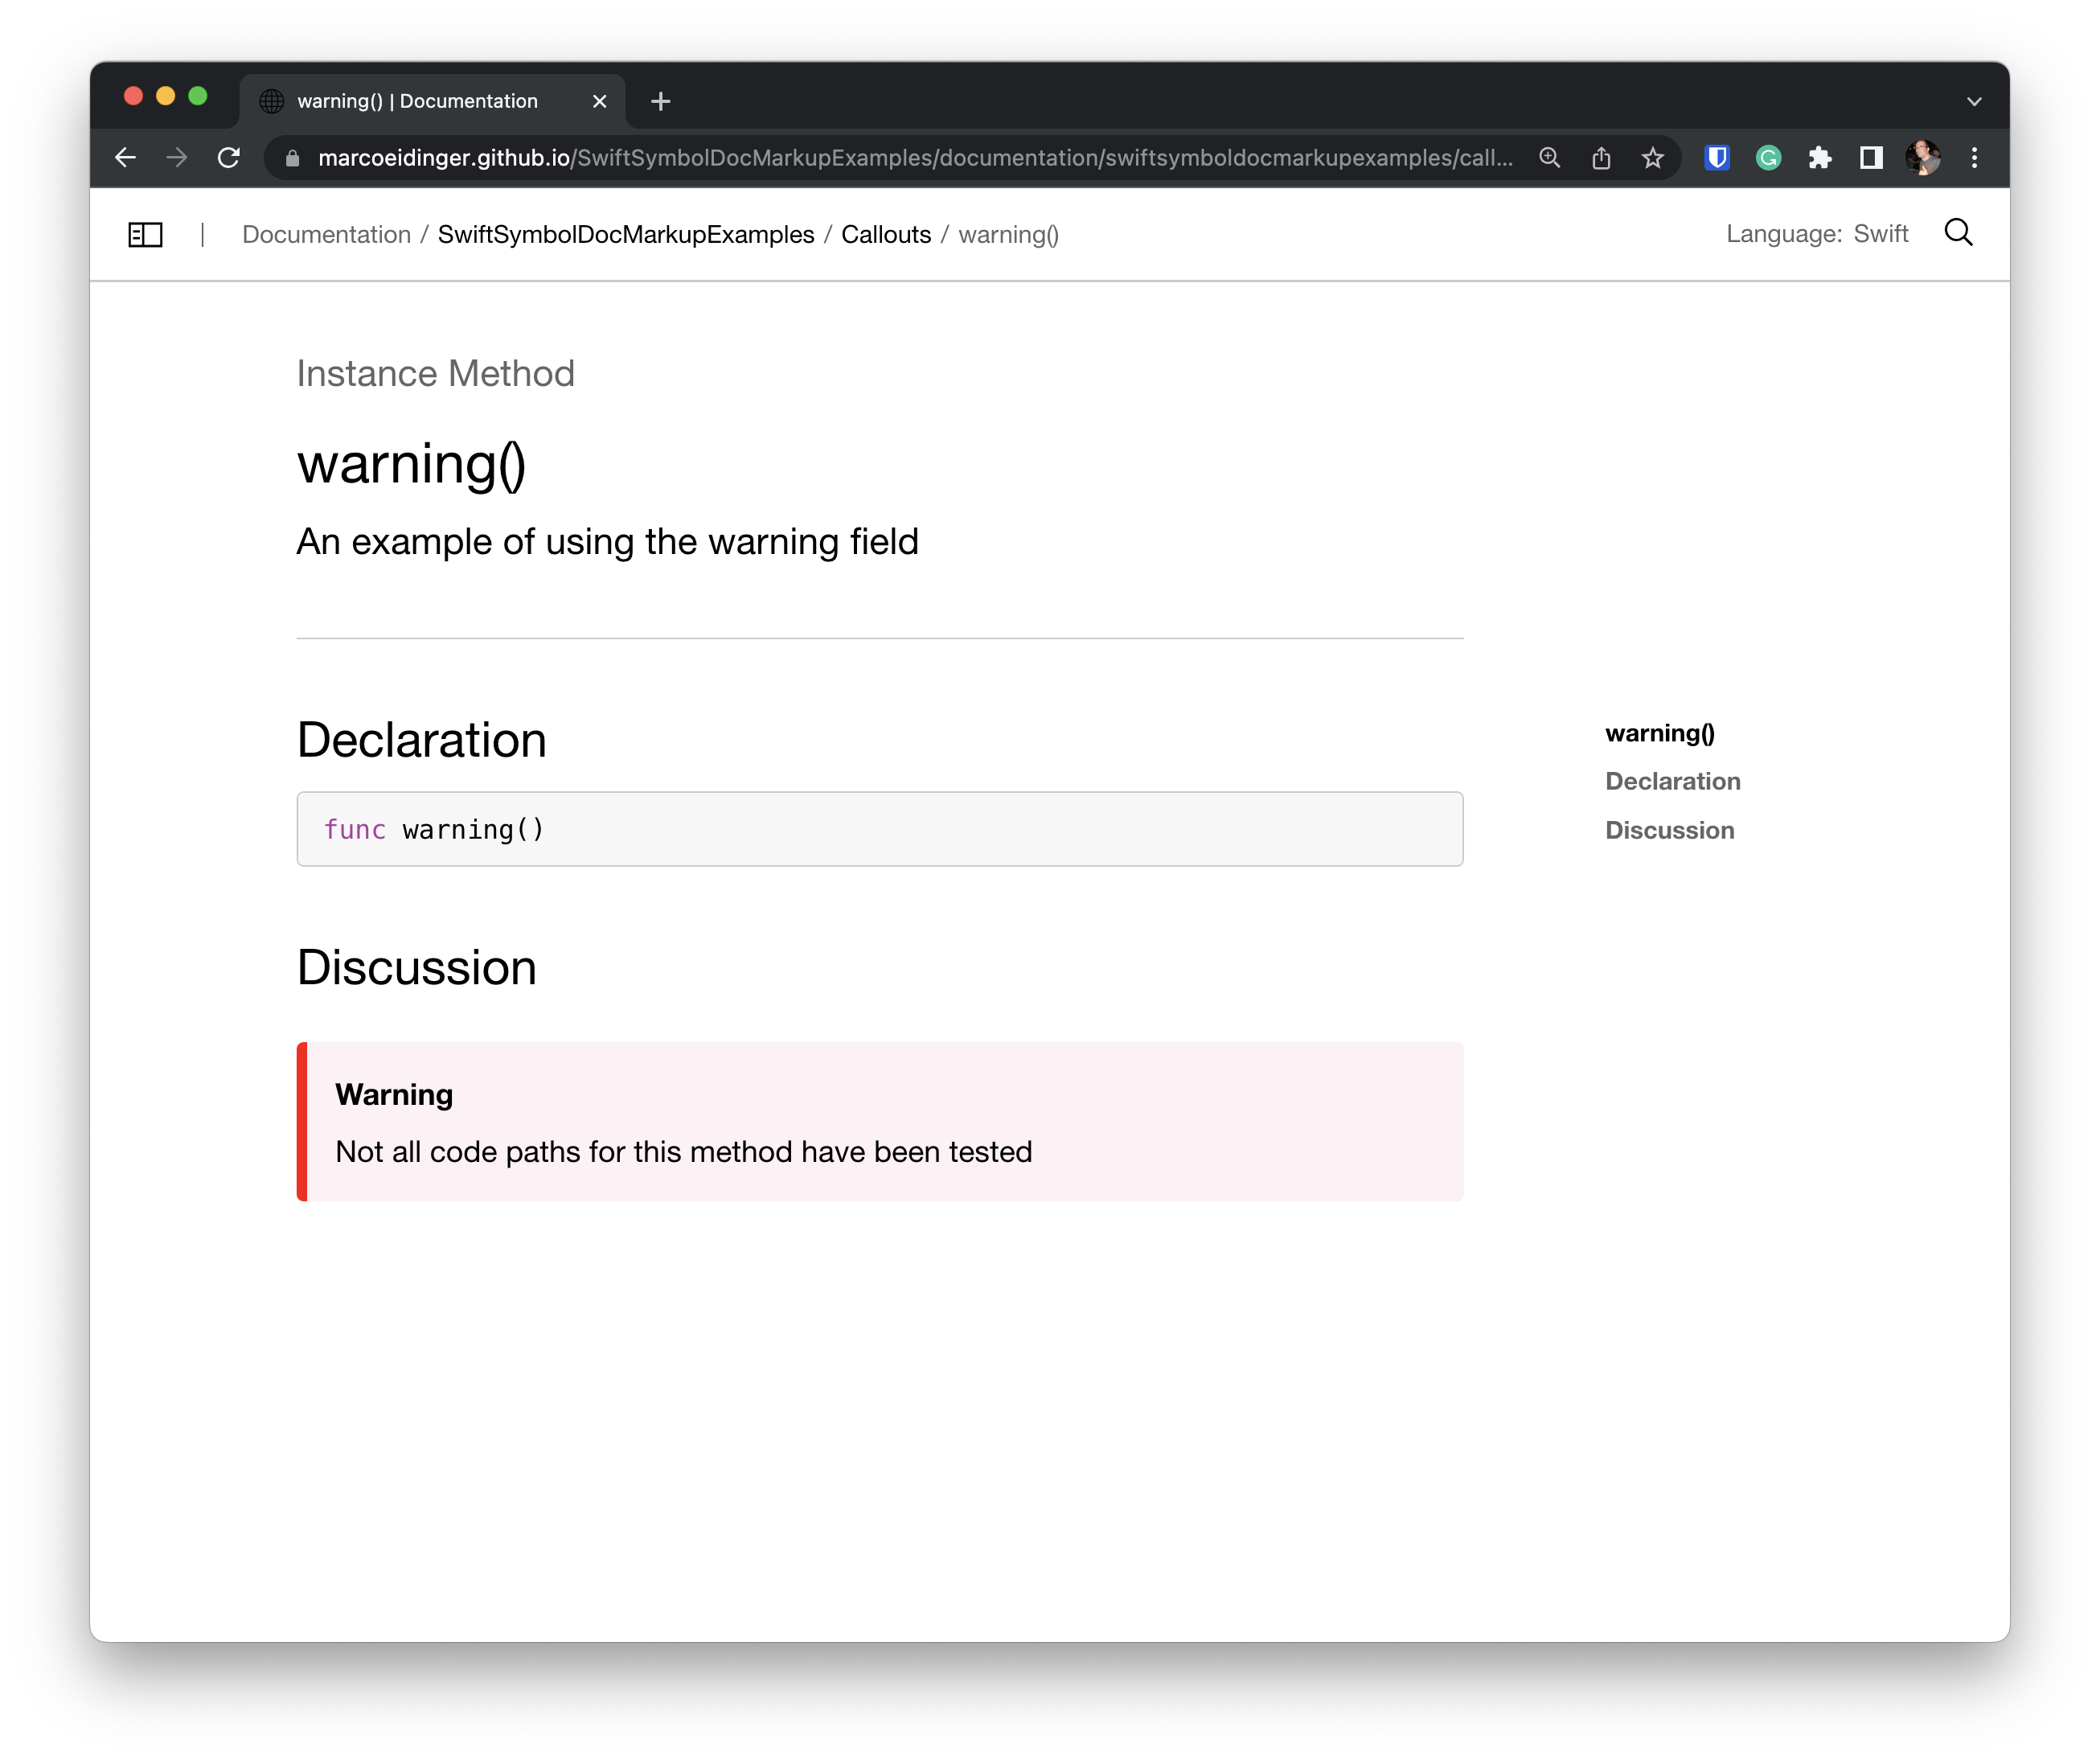
Call-out boxes (a.k.a asides in DocC) were an early concept in the Xcode Markup Reference and were defined with a dash (-), e.g. Note: some note.
DocC promotes the following callouts:
| Type | Usage |
| Note | General information that applies to some users. |
| Important | Important information, such as a requirement. |
| Warning | Critical information, like potential data loss or an irrecoverable state. |
| Tip | Helpful information, such as shortcuts, suggestions, or hints. |
| Experiment | Instructional information to reinforce a learning objective, or to encourage developers to try out different parts of your framework. |
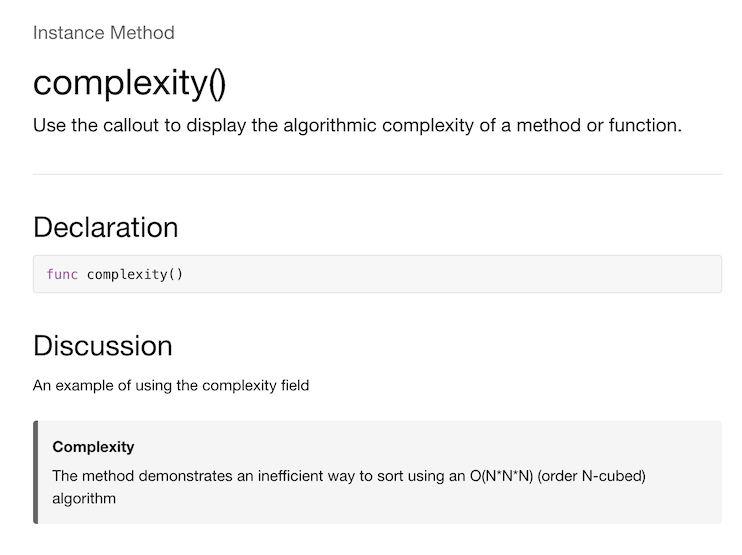
There are plenty more built-in "legacy" callouts, e.g.
ComplexityCopyrightTodo,Version...
Most of them are supported by DocC Renderer.
However, some legacy callouts are neither supported by Xcode Quick Help or DocC but might be rendered by other tools like Jazzy:
See AlsoKeywordRecommended...
You will find a complete list of working callout examples here:
The "not-working" examples you will find here:
Custom Callouts
For DocC you should declare a callout with >, e.g. > Note: some note.
This allows you to create custom callouts.
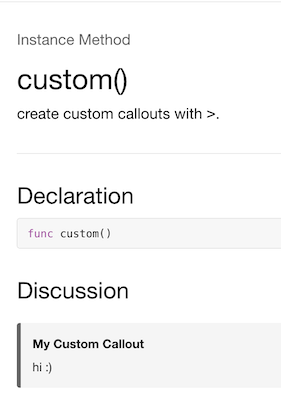
    /**
     create custom callouts with `>`.

     > My Custom Callout: hi :)

     */
    public func custom() {}
Xcode Quick or Jazzy will not render custom callouts.
Reference Guide
I created a Swift code base that uses and illustrates the various Markup options to create symbol documentation.
The respective DocC-generated documentation is hosted as a static web page on GitHub and is accessible through this link.
It includes a mega example to highlight all the options.
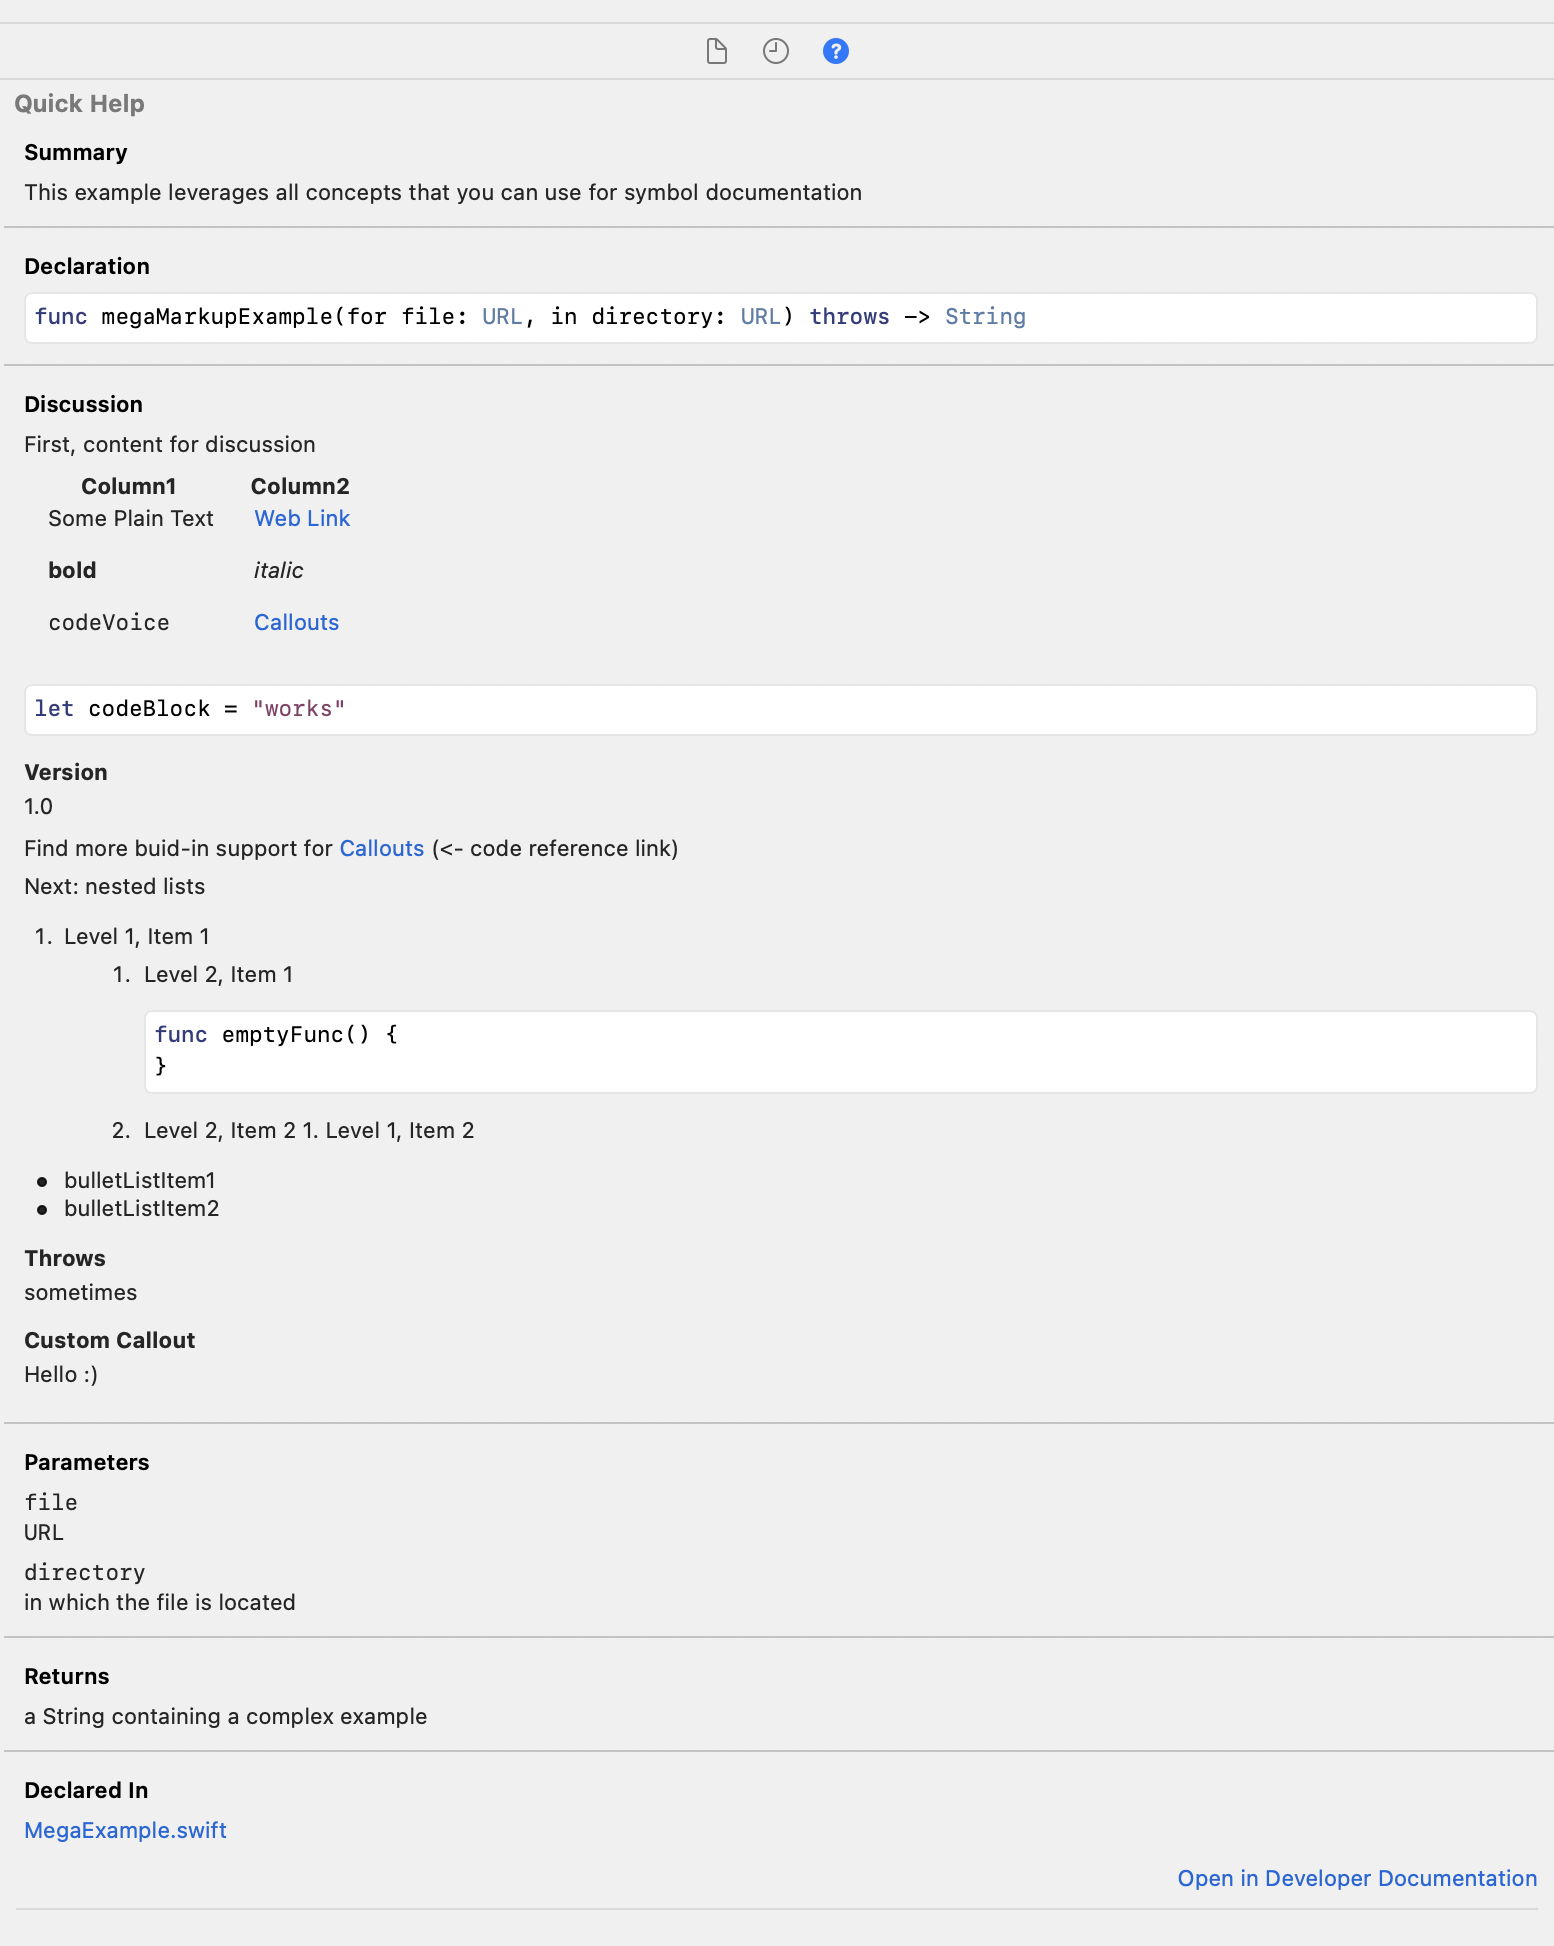
Mega Example
import Foundation
/**
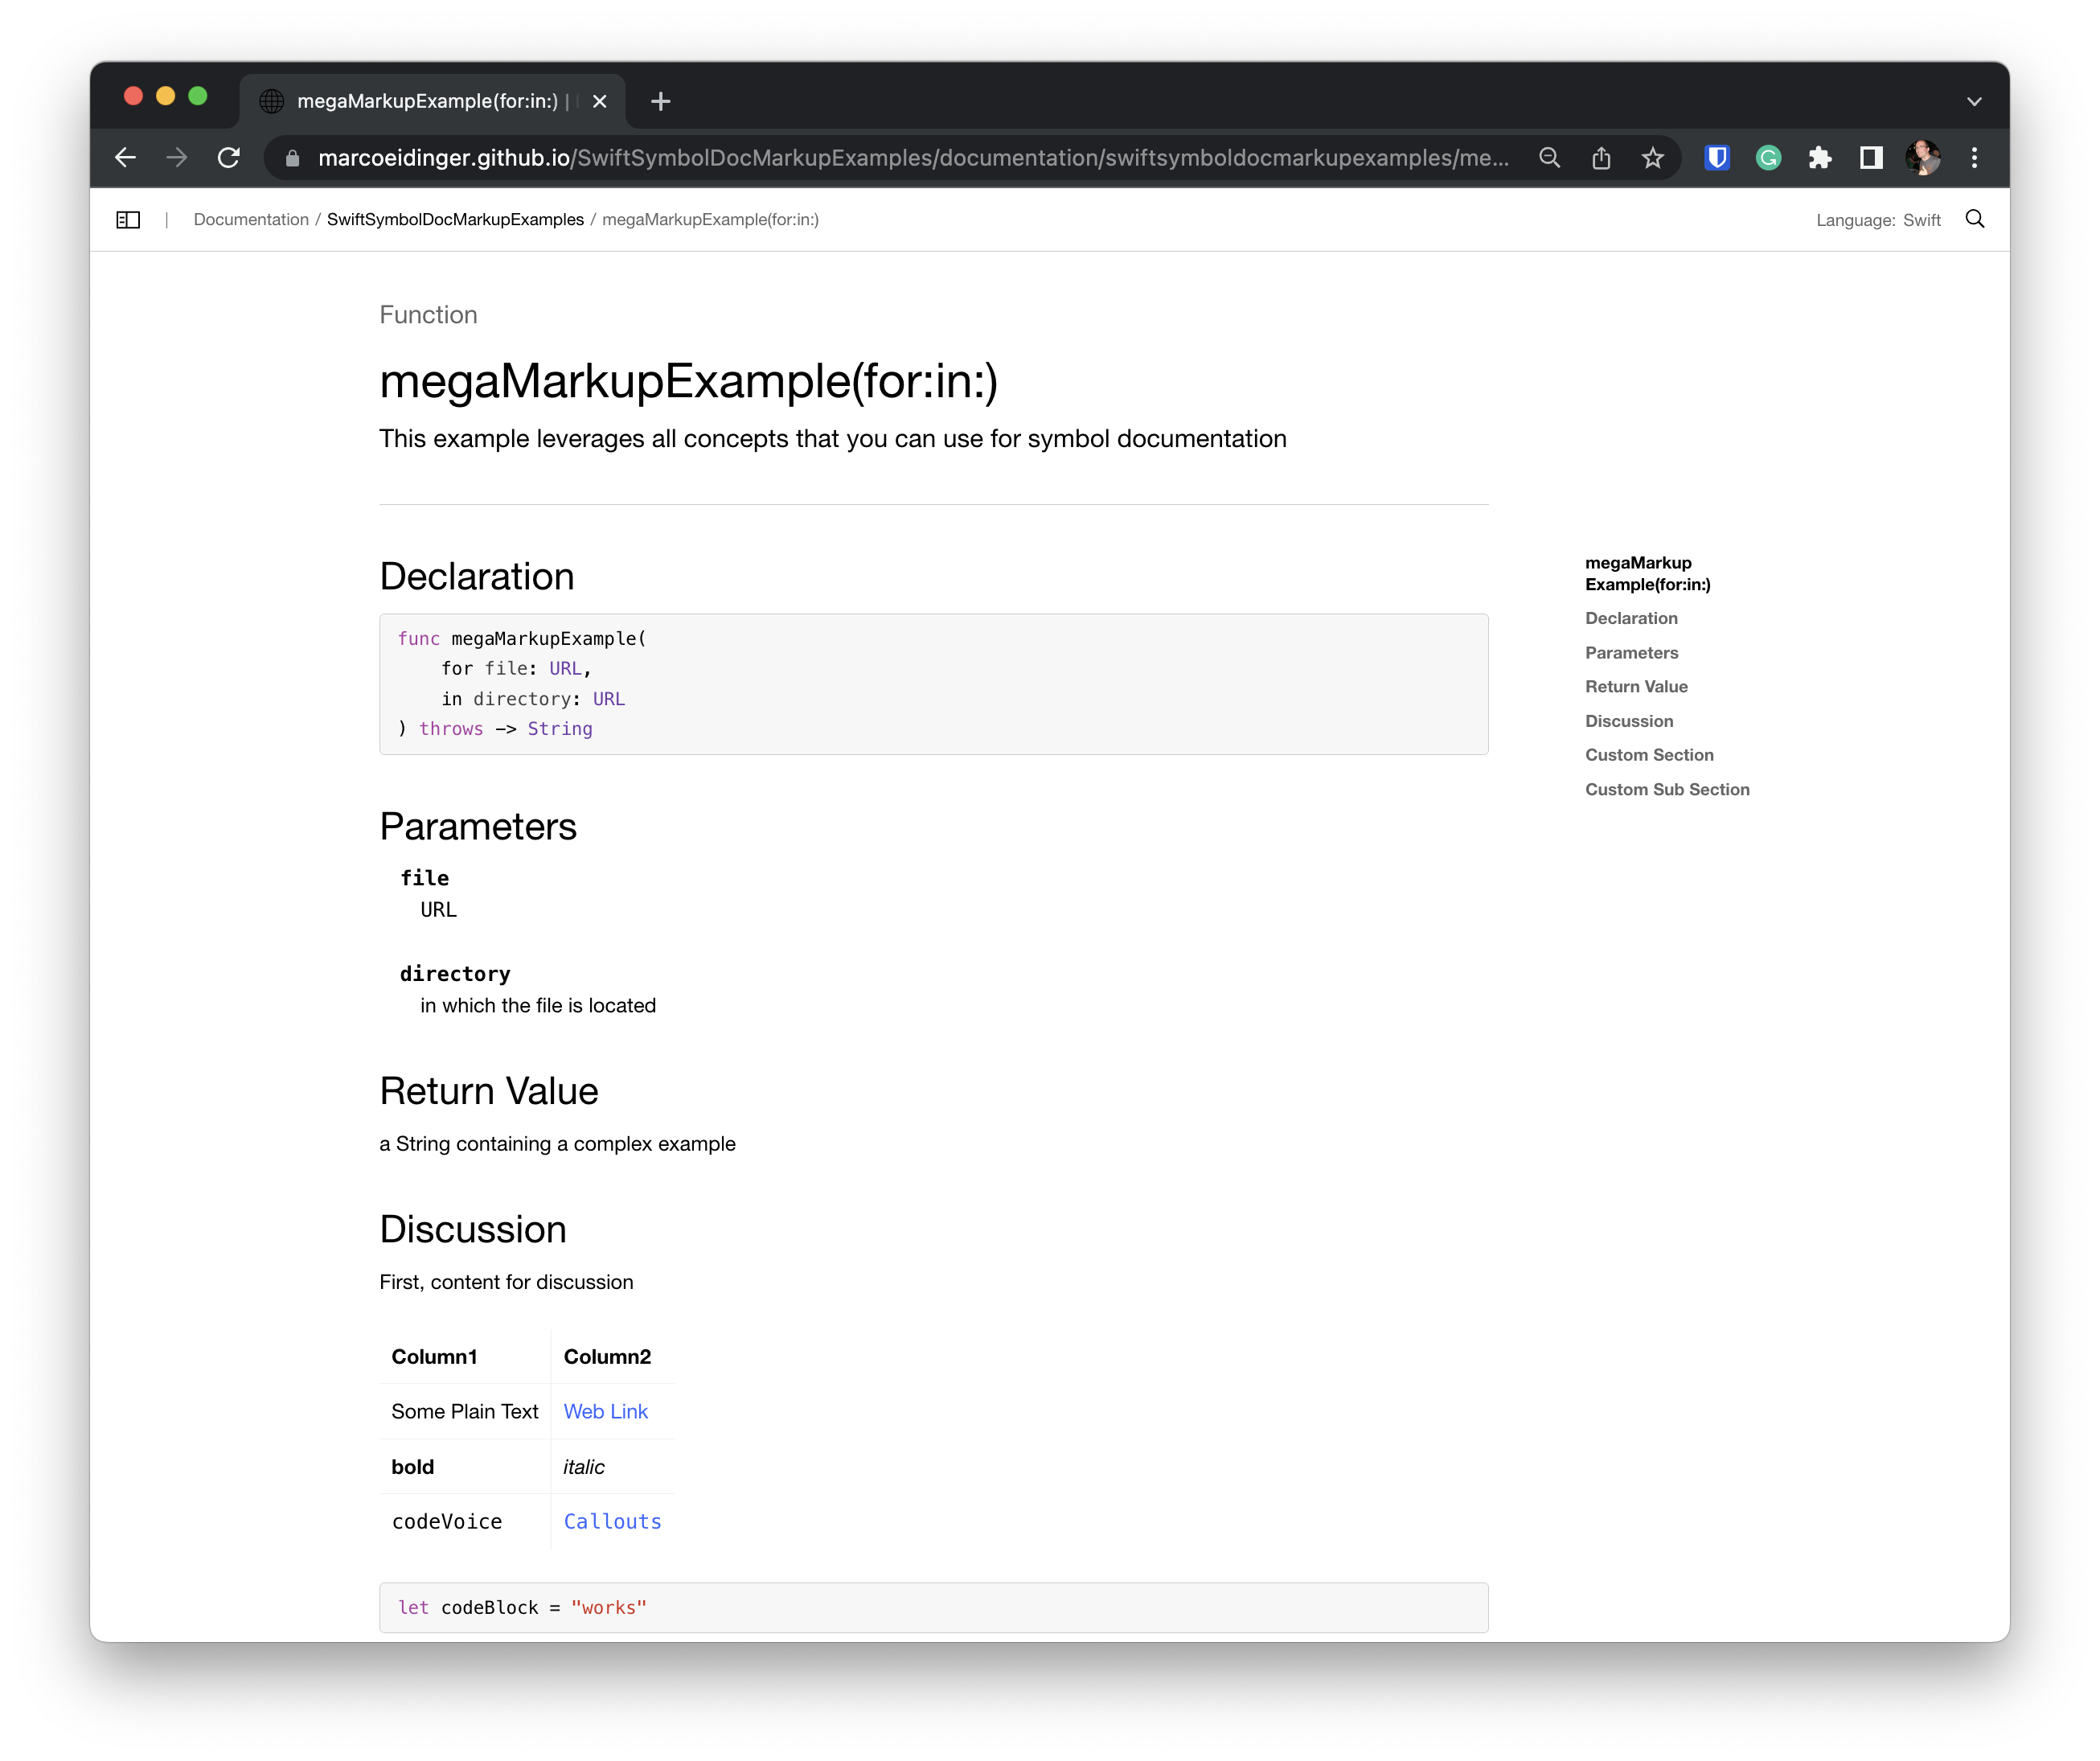
This example leverages all concepts that you can use for symbol documentation
First, content for discussion
| Column1 | Column2 |
| ------------ | ----------------------------------- |
| Some Plain Text | [Web Link](https://www.google.com) |
| **bold** | *italic* |
| `codeVoice` | ``Callouts`` |
```swift
let codeBlock = "works"
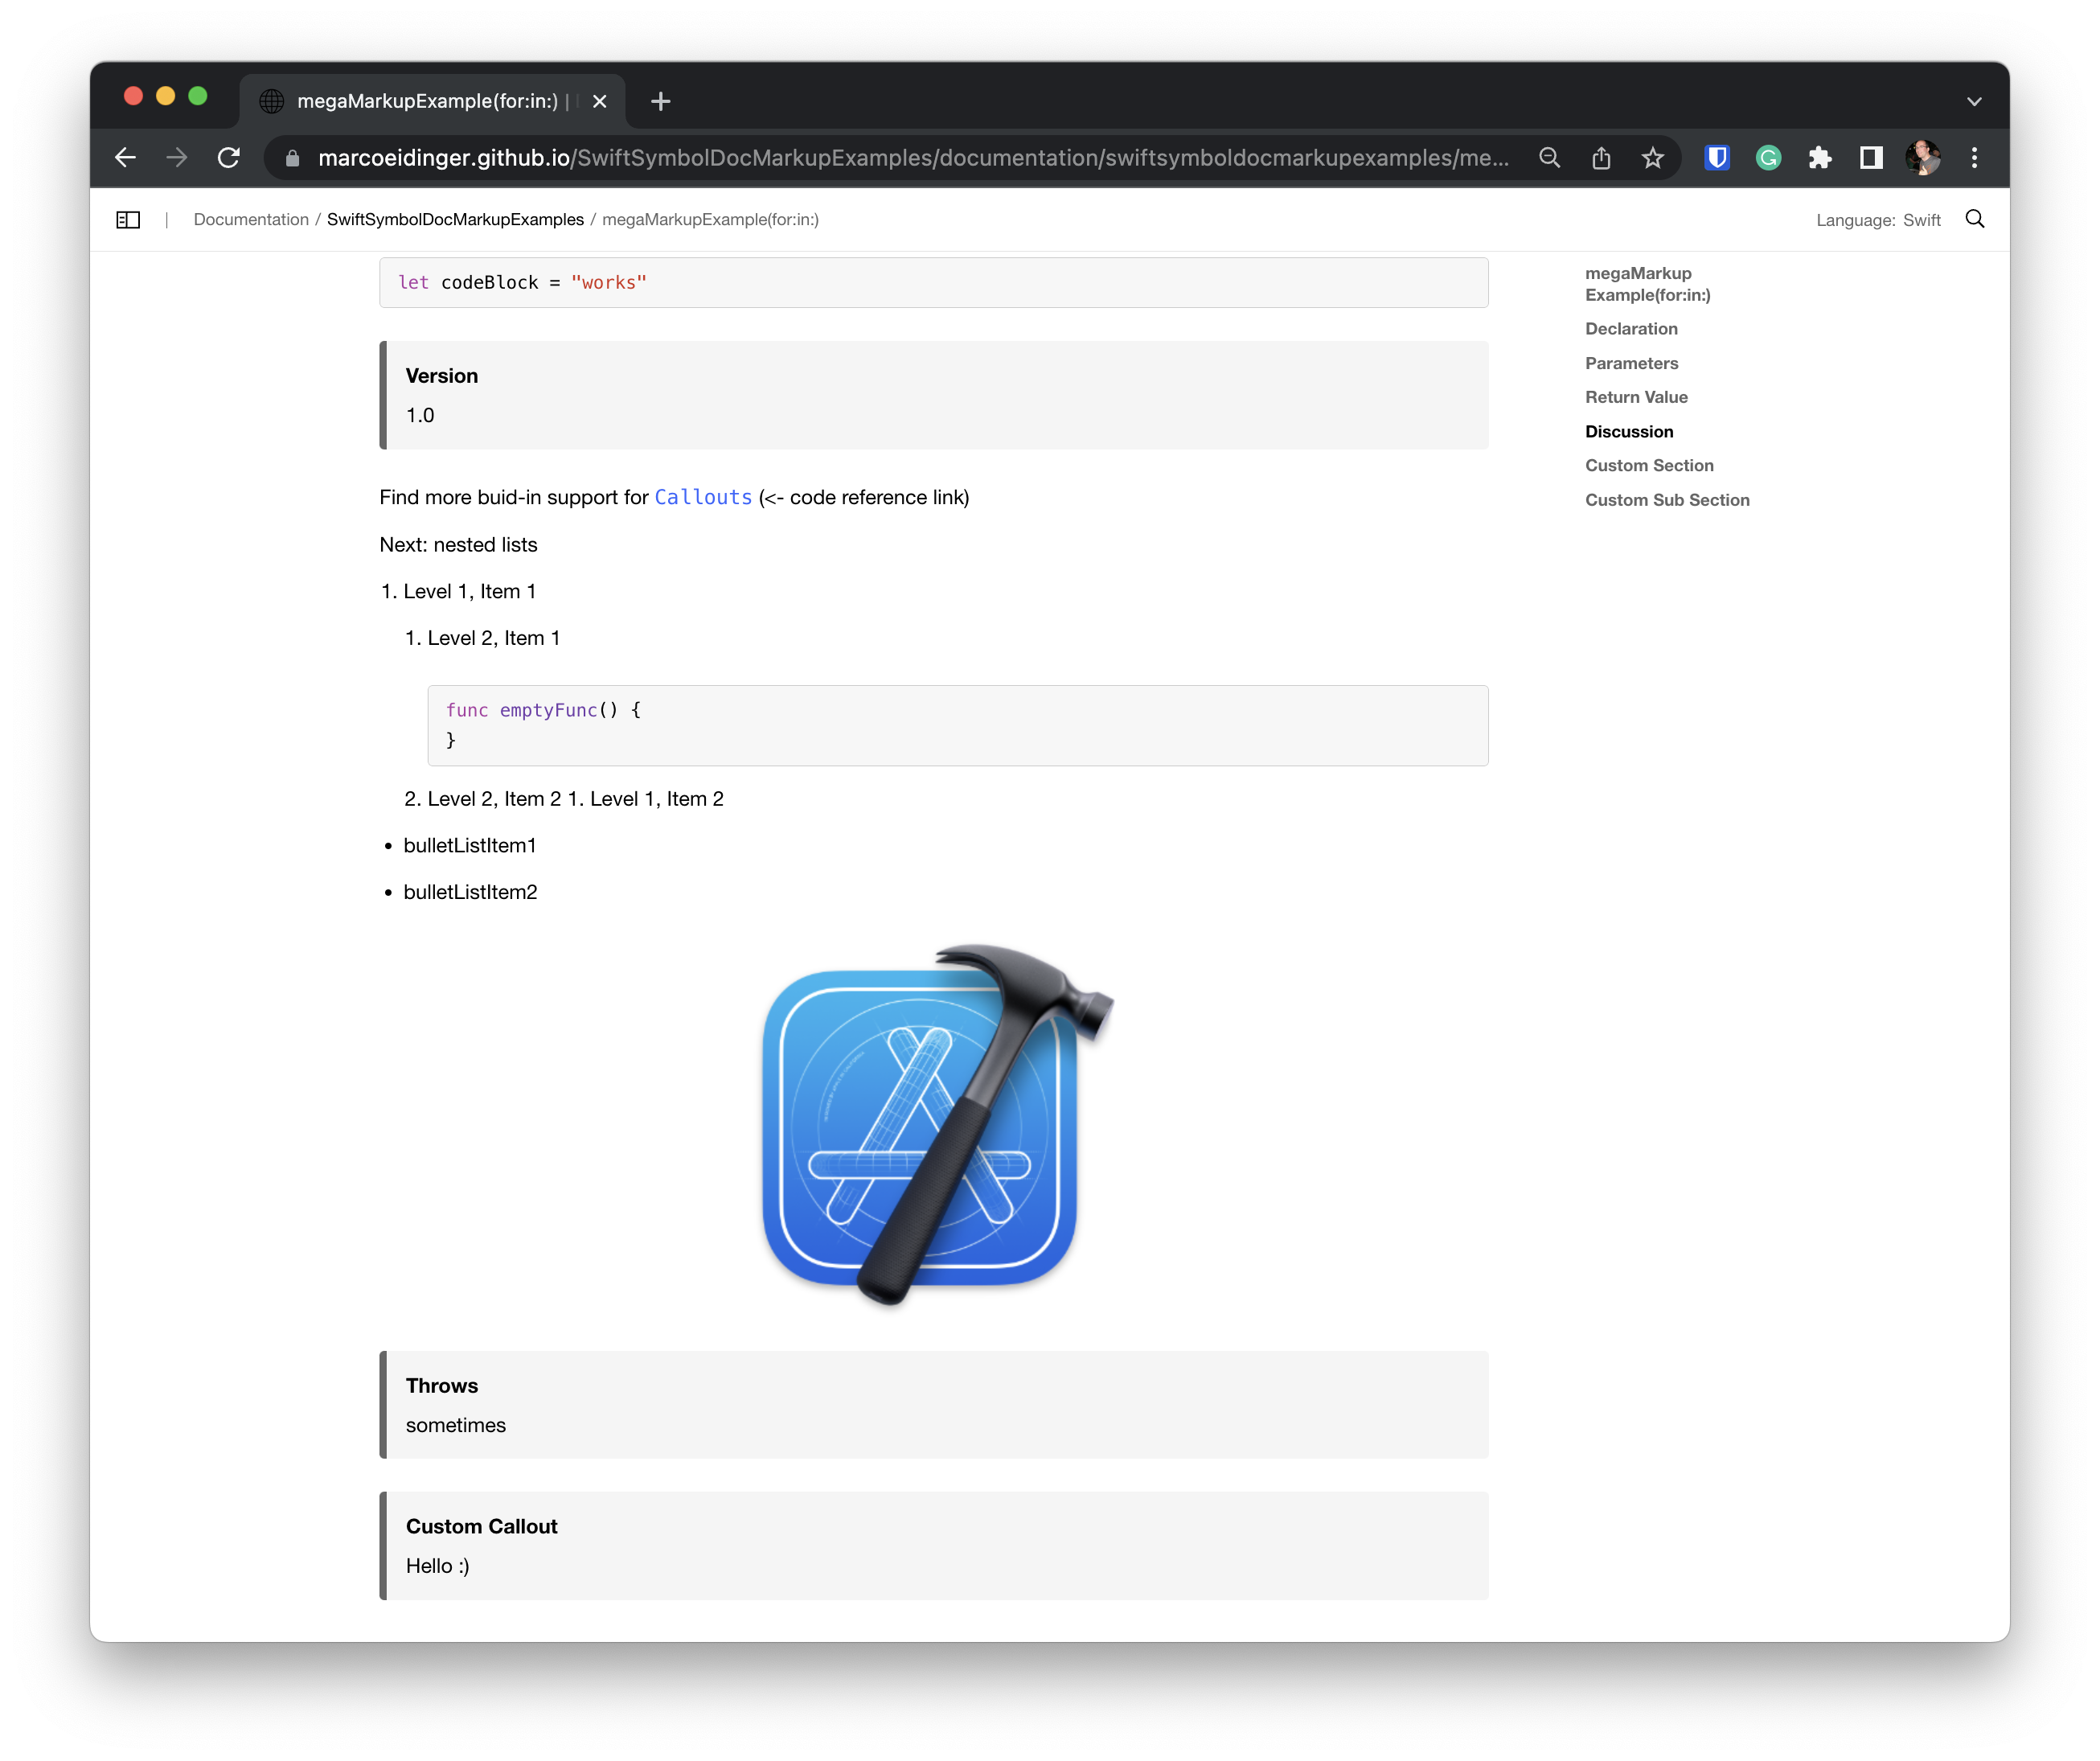
version: 1.0
Find more buid-in support for
Callouts(<- code reference link)Next: nested lists
- Level 1, Item 1
- Level 2, Item 1
func emptyFunc() { } - Level 2, Item 2
- Level 2, Item 1
Level 1, Item 2
bulletListItem1
- bulletListItem2
- Parameters:
- Level 1, Item 1
- file:
URL directory: in which the file is located
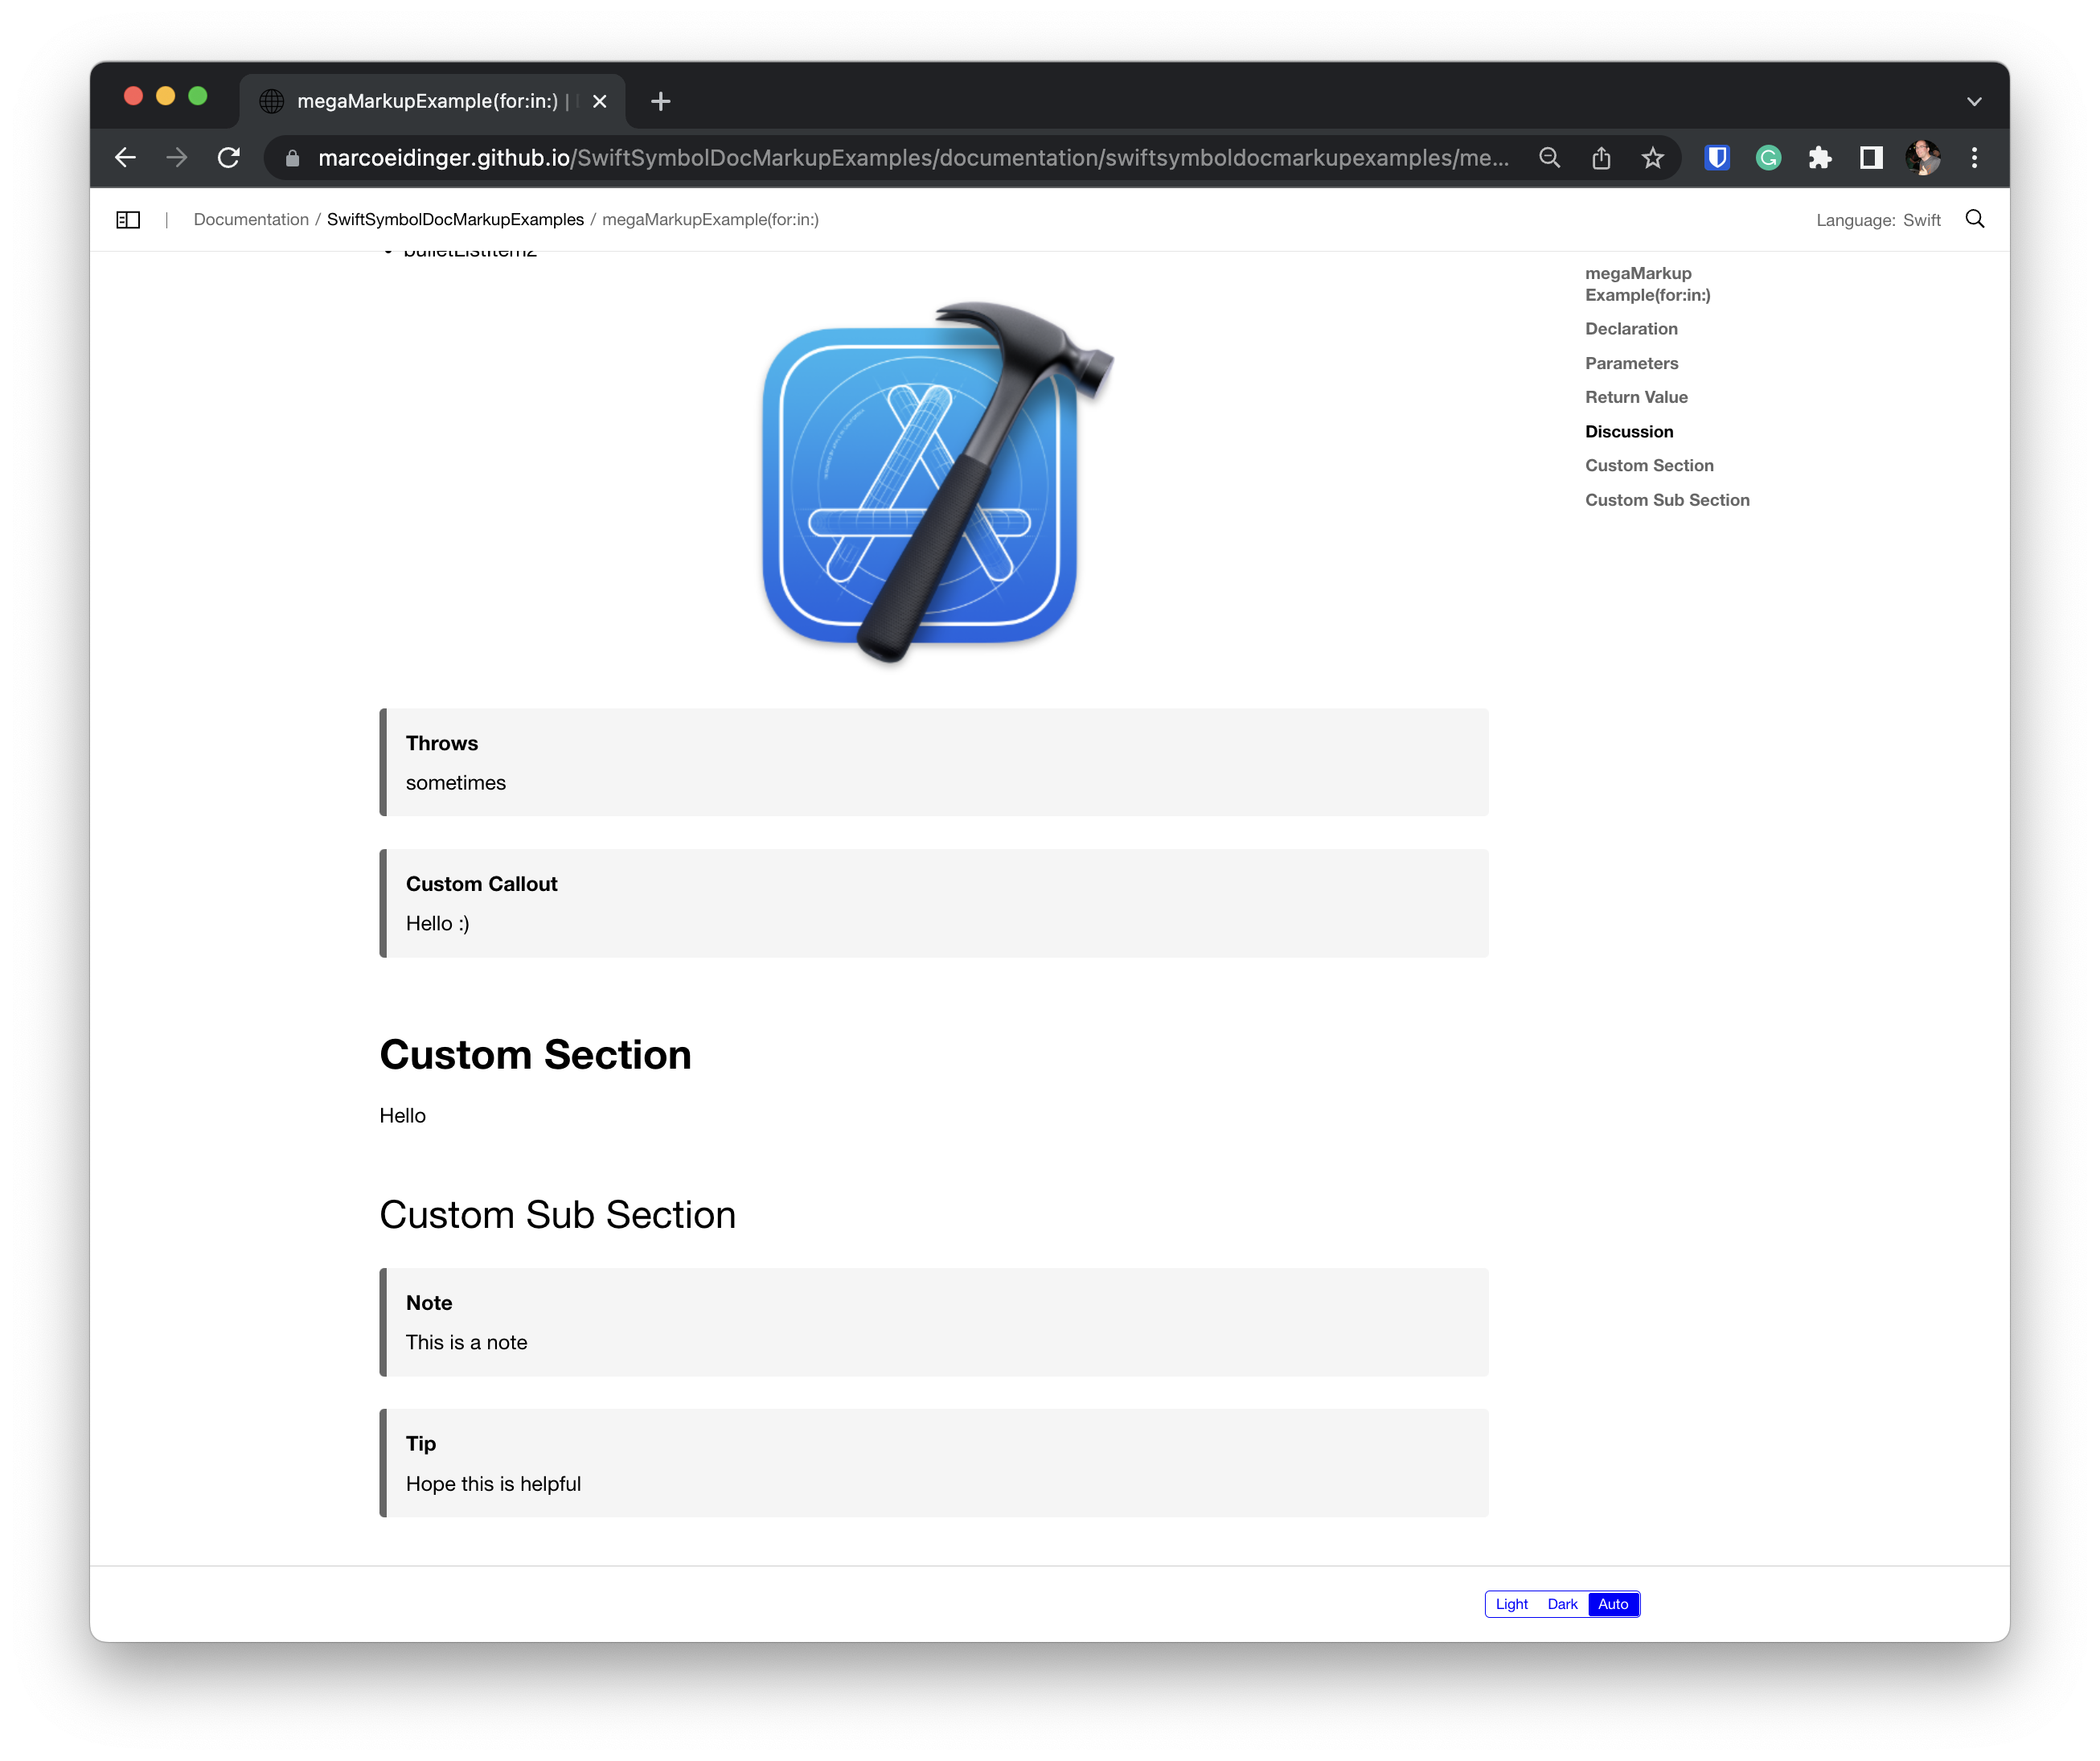
- Throws: sometimes
- Returns: a String containing a complex example
Custom Callout: Hello :)
Custom Section
Hello
Custom Sub Section
- Note: This is a note
Tip: Hope this is helpful
*/ public func megaMarkupExample(for file: URL, in directory: URL) throws -> String { "" } ```
Visualization in Xcode Quick Help
Visualization by DocC Renderer
Individual examples
Markdown
Documentation Code => Rendered Doc-C documentation